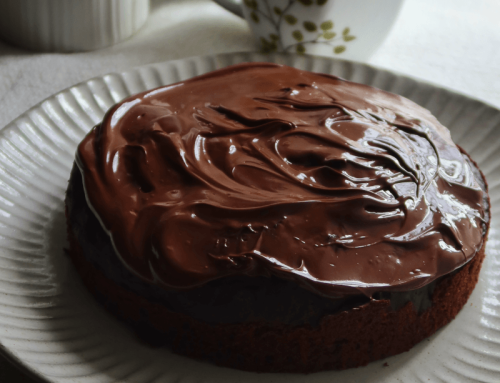
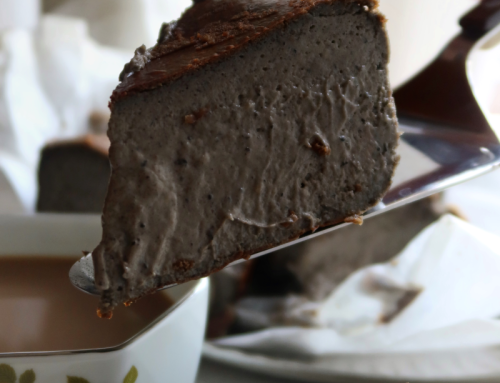
Presenting my first ever decorative cake recipe, which happens to be my birthday cake too! This Chocolate Brownie Cake is sandwiched with Swiss Meringue Buttercream and topped off with dark chocolate ganache and strawberries. I will include the recipe for the buttercream too for your reference!

Its an annual tradition I have set for myself to bake my own birthday cake! Therefore, by selecting this Chocolate Brownie Cake, I hope to practice the skills that I have developed over each year. Although the decoration isn’t exactly professional looking, I still had a lot of fun making it.
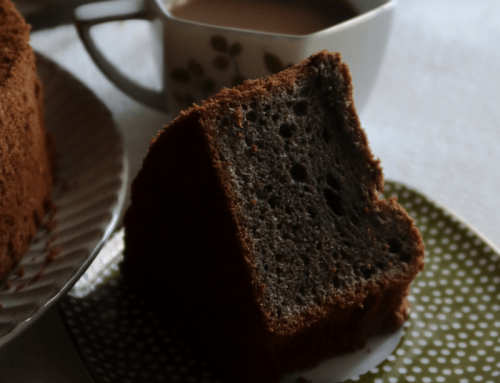
Also, the taste was amazing! This is the perfect cake for whoever who likes a cake on the denser end; it’s like a rich and chocolate-y cake-y brownie!
I used a handmixer for everything since it was kind of hectic for me in the kitchen. However, you can definitely feel free to hand-whisk it instead as the cake batter comes together very easily. The swiss meringue buttercream is stable and fluffy at room temperature even our hot climate though it requires a notch of extra work. Its worth every additional effort as compared to the traditional buttercream.
Also, I am using a reverse-creaming method to give the denser finish for the Chocolate Brownie Cake. The more common method (creaming) involves mixing of the sugar into the butter. However, in reverse-creaming, the butter is instead added into the dry ingredients. Honestly, there isn’t much obvious differences so fret not if you mixed it the normal creaming way!
Without further ado, let me share the joy of my birthday through this Chocolate Brownie Cake!
Chocolate Brownie Cake Recipe
by Javier Tan March-22-2020
Amazingly decadent and fudgy, this Chocolate Brownie Cake is perfect for any occasion. I used this recipe for my 23rd Birthday!
Ingredients
For Cake:
- 1 Cup or 225g of Unsalted Butter, Softened at Room Temperature
- 2 Cups or 360g of All-Purpose / Plain Flour
- 1 and 1/2 Cups or 300g of Granulated White Sugar
- 1 and 1/3 Cup or 320ml of Milk (Room Temperature)
- 4 Large Eggs, weighing approx 60g including shell
- 1 Tsp or 5ml Vanilla Essence (2.5ml if using extract)
- 2.5 Tsp or 10g of Baking Powder
- 1 Tablespoon or 12g of Coffee Powder (Optional)
- 3/4 Cup or 75g of Cocoa Powder
- 1/2 Tsp or 3g of Table Salt
For Swiss Meringue Buttercream:
- 1 Cup or 225g of Unsalted Butter, Softened at Room Temperature
- 3 Egg Whites (from Large Eggs)
- 3/4 Cup or 150g of Granulated White Sugar
- 1/2 Teaspoon or 2.5ml Vanilla Extract
Instructions
- Line two 7 / 8 inch round baking trays with parchment paper and preheat the oven to 180 degreesC or 350F.
- Sift together the dry ingredients (Baking Powder, Flour and Cocoa Powder). Then, add the sugar and table salt into the dry mixture.
- In a small separate bowl, mix together the eggs and milk and have it ready aside. (Dissolve the coffee powder into the milk at low heat before this stage, if using).
- Then, add the unsalted butter into the dry ingredients and cream for 2 minutes at medium high speed (it will form same-sized clumps).
- Next, add in half the egg-milk mixture and beat at medium-low speed for 1.5 minutes. After which, add in the other half and beat at high speed for 1.5 minutes.
- Transfer to the baking trays and bake for approx 30 – 36 minutes and test for doneness using a toothpick. If browning too much at the top, reduce temperature to 160 degrees C from 28th minute.
- Finally, cool 2 hours before frosting.
- For the Swiss Meringue Buttercream, mix together the egg whites and sugar using a whisk. Then, place the bowl over simmering water (double boiling method).
- Continue stirring the egg whites sugar mixture until it is 60 degrees C or feels warm to the pinkie.
- Proceed to mix the egg whites sugar mixture at high speed for about 7-8 minutes or until stiff peaks is attained.
- After which, add the unsalted butter in tablespoon portions and mix it in at low speed until the buttercream comes together (approx 3 minutes).
- Add desired flavouring (I used vanilla extract) and whisk it in at low speed for 30s.
Details
- Prep time: 45
- Cook time: 45
- Total time: 1
- Yield: 2 Decadent Brownie Cake Layers!
Notes:
- If you would like to be updated for more recipes which I strive to create to perfection for sharing and for free, do check out my Instagram, Facebook Page, or YouTube 🙂 Thank you so much for all of your support! Feel free to tag me or link back here!
- Best eaten within 5 days! You can halve the recipe if you would like.
- Feel free to ask if you need help!
Enjoy!
– Bakeomaniac, Javier Tan


It looks awesome. Thank you for sharing this recipe.
Thank you for the kind praise and dropping by my blog 🙂