

Soft, fragrant and finished with juicy lychees, these Mini Rose Lychee Cakes bring together a nostalgic floral flavour with refreshing fruitiness in every bite.
The rose cake is made with neutral vegetable oil, giving it a moist and tender crumb without the heaviness of a traditional butter cake. Once baked, it is brushed with lychee syrip or juice, covered with a thin layer of rose buttercream and cut into individual squares. Each mini cake is then finished with a thin layer of cream, and homemade lychee topping.
With their pink and white colours, these little cakes also made a lovely National Day bake inspired by familiar local flavours such as bandung. They look festive while remaining approachable enough for beginner bakers, no splitting, stacking or complicated cake assembly required!
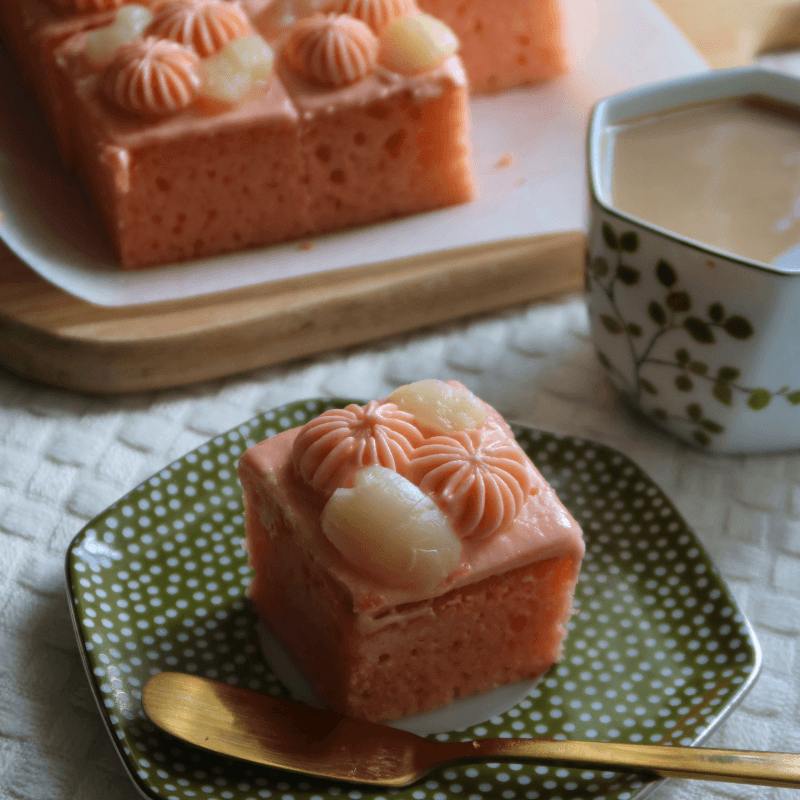
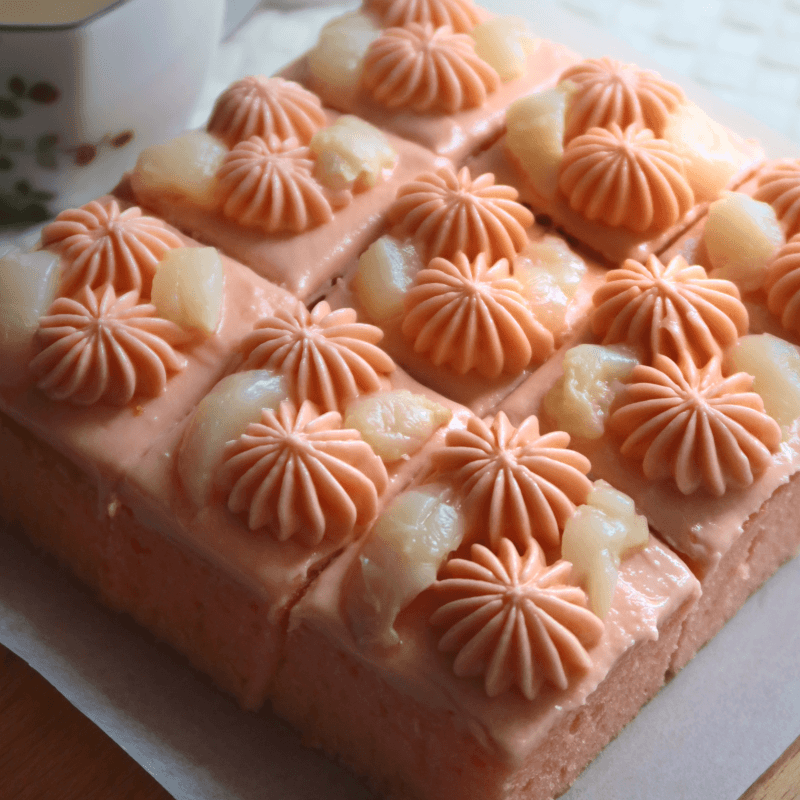
Why You Will Love This Rose Lychee Cake Recipe
- Soft and moist oil-based cake. Using canola or another neural vegetable oil gives the cake a soft, fine crumb that remains moist even after refrigeration. There is also no need to cream butter and sugar together.
- Fragrant without being overpowering. Rose can easily become overly perfumed, so this recipe uses rose syrup for a soft, sweet rose fragrance. The syrup is balanced with milk and lychee juice so that the floral flavour complements rather than overwhelm the cake.
- Less sweet than many decorate cakes. The cake itself contains 85g, with a thin layer of buttercream.
- Easy single-layer presentation. Instead of stacking multiple layers, the cake is served as one substantial layer and cut into mini squares. This uses less buttercream, is easier to portion and eliminates the risk of cream or fruit filling squeezing out between layers.
This cake is excellent in celebrating local, nostalgic flavours and I hope you will enjoy it as much as I do!
Without further ado, the recipe.
Mini Rose Lychee Cake Recipe
by Javier Tan August-03-2026
Make soft and fragrant Mini Rose Lychee Cakes with moist rose oil cake, infused buttercream and a refreshing homemade lychee topping.
Ingredients (Rose Lychee Cake)
- 1/3 Cup + 1 Tbsp or 85g White Sugar
- 2 Large eggs, approx 60g each weighed with shell
- 1/3 Cup + 1 Tsp or 80g of Neutral Flavoured Oil (e.g. Canola, Sunflower, I am using Oki Premium Oil)
- 1 Tbsp or 18g Rose Syrup
- 2 Tsps or 10g Lychee Syrup
- 1/4 Cup + 2 Tsps or 70g Milk
- 1/2 Tsp or 2.5ml Vanilla Essence
- Pink food colouring, as necessary
- 1 and 1/4 Cup or 160g Plain Flour
- 1 and 1/4 Tsp or 5g Baking Powder
- Additional 20g – 30g Lychee syrup for brushing
Ingredients (Topping, Rose Buttercream)
- 2/3 Cup or 150g Softened Butter
- 1 and 1/4 Cup or 150g Icing Sugar, sifted
- 8g Rose Syrup
- Pink food colouring
- 9 – 18 Lychees for topping and serving
Instructions
- In a large bowl, combine the eggs and sugar.
- Then, mix in the oil, rose syrup, lychee syrup, milk, vanilla and pink food colouring.
- Sift and whisk in the plain flour and baking powder.
- Transfer the batter to a 7 inch square tray and bake 160C in a pre-heated oven for 30 – 34 mins until darker pink and a toothpick inserted comes out clean.
- Leave the cake to cool and brush with extra lychee syrup. I like to slice the cakes at the edges too and brush with additional syrup.
- Meanwhile, make the buttercream by creaming together softened butter and icing sugar, then adding in rose syrup and pink food colouring.
- Apply a thin layer of buttercream before slicing the cake into 9. I made simple piping patterns before topping off with fresh lychees.
- Serve and enjoy!
Details
- Prep time: 1 hour
- Cook time: 40 mins
- Total time: 1 hour 40 mins
- Yield: Makes 9 Slices of Mini Rose Lychee Cake
Notes:
- If you would like to be updated for more recipes which I strive to create to perfection for sharing and for free, do check out my Instagram, Facebook Page, or YouTube 🙂 Thank you so much for all of your support! Feel free to tag me or link back here!
- Store well refrigerated for up to 5 days, best consumed within the first 2 days.
- Please do not copy and paste the recipe without my permission, but feel free to link back here!
Enjoy!
– Bakeomaniac, Javier Tan


Hi Javier, the rose water is it we boil sugar with boil and add abit of red colouring and rose essence to make rose syrup? Also your buttercream piping is so beautiful. The measurement of the buttercream is same ratio, will it not be too soft to pipe. Wilton buttercream is so so sweet. Do you have any nice buttercream recipe, can please share. Hope to here from you soon.
Hi Amy, apologies for the really late reply :’) For the rose water / syrup, I’ll recommend buying in-store as it is much easier and already concentrated! For the specific rose syrup brand I used here, it’s the Da Vinci brand. Thanks for your kind compliments on the buttercream piping too, I tried using less sugar and cut to the extent where it’s still okay to pipe!