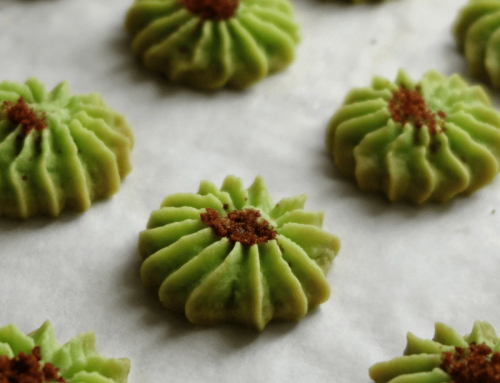
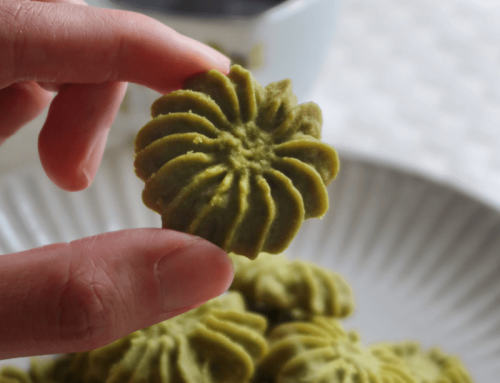
My happy accident! That’s what I call these Green Velvet Crinkle Cookies. I am not so sure if anyone will even bake these at all, but hey, you never know when you need it!

This Green Velvet Crinkle Cookies is highly similar to that of the Red Velvet Crinkle ones ( that also included Hershey’s Kiss Chocolates ) and that of the original cocoa version (with no colouring).
I was inspired to bake a blue version of it, still crinkle cookies though, in order to practice and give ideas for my friend’s upcoming 21st birthday party but it turns out that upon adding blue colouration, these green crinkle cookies were born! I was really dejected initially but went on with the creation of them and did not regretted a single bite!
Let me now break the recipe into the three parts of Taste and Texture, Ingredients and Method of Preparation!
For the taste and texture, they taste just like little brownie cookies. They are somewhere in between, and an in-between of two really good things is naturally really good itself! It is packed full with subtle chocolatey goodness that one will definitely not find too sweet. The melting icing sugar once you eat the cookie is a sensation to behold too!
For the ingredients, I would only like to elaborate on the usage of baking powder and the colouring used.
In crinkle cookies, baking powder is often used to produce carbon dioxide that will leave the cookie while its baking, creating a cracking and crinkling effect (please do correct me if I am wrong!). As such, do make sure to add baking powder and also do not omit it or else you will not be able to produce the same effect! Yes, it is alright to use self-raising flour here!
Next, the colouring. I know it will seem absolutely surprising, but here, you will be using blue colouration and NOT green colouration. It is the mixture of blue colouration with the dullness of the cocoa powder that allows the production of this matte hue of green! I am not exactly sure but I think you can achieve the same thing with green colouration though no guarantees will be issued from my side as of yet!
Now, the Method of Preparation.
Do take note to refrigerate the batter for the full duration before scooping it onto the baking tray for baking. If you do not refrigerate it, the cookies will spread too much and they might turned out looking slightly flattened. It might even as though you sat on your own cookies!
Also, I refrigerated the batter whenever I am not using them between batches so that it can maintain that nice dome shape for every single batch! Consistency is key!
Finally, the recipe!
Green Velvet Crinkle Cookies
by Javier Tan September-23-2018
I call these cute cookies my happy and delicious accidents! I think they would go extremely well with the Red Velvet version during Christmas!
Ingredients
- 1 and 1/2 Cup or 180g All Purpose Flour
- 3 Tablespoons + 1 Teaspoon or 25g Cocoa Powder
- 1 Teaspoon or 4g Baking Powder
- 1/4 Teaspoon or 1.4g Table Salt
- 1/2 Cup or 100g Granulated Sugar
- 1 Teaspoon or 5ml Vanilla Extract
- 2 Eggs, Large, 55g each, Room Temperature
- 1/3 Cup or 75g Unsalted Butter, Softened at Room Temperature
- 1/2 Cup or 100g Powdered Sugar
- Blue Food Colouring, to Preference. Yes Blue!
- Set aside the baking powder, cocoa powder and all purpose flour in a bowl ( to be sifted in later ).
- Beat the room temperature butter fro a minute or so to loosen it up, and then cream it together with the two sugars until light and fluffy.
- Add in the two eggs, beating the batter with each addition of the egg until there are no longer dark yellow streaks of egg yolk.
- Add in the salt and vanilla extract and mix until well incorporated. Add in the blue food colouring as well until you achieve a desired colour consistency. Note that upon adding in the cocoa powder, it will turn green.
- Sift in the dry ingredients into the main batter and mix well until there are no longer any lumps of dry ingredients visible.
- Refrigerate the batter for at least about two hours to allow it to harden slightly, allowing it to be more manageable when you bake them later.
- When ready to bake, preheat your oven to 180 degrees C or 350F, line your baking trays with parchment paper and unwrap the kisses.
- Prepare a shallow bowl of powdered sugar and set aside.
- Use 2.5 teaspoons or about 22g of batter, shape it into a ball using your hands and coat well with powdered sugar, set aside at the baking tray. Repeat for the rest.
- Bake for about 9-11 minutes, or until nicely cracked.
- Cool for about 30 minutes at room temperature before serving.
- Serve and Enjoy!
- Prep time:
- Cook time:
- Total time:
- Yield: 24 Cookies
Notes:
- Store well at room temperature in a container for up to 4 days. I stored them in a single layer as the chocolate might get messy ( its melty ). Use snow sugar if you would like to maintain the aesthetics, and icing sugar instead if you would prefer flavour over aesthetics!
- If you would like to be updated for more recipes which I strive to create to perfection for sharing, do check out my Instagram, Facebook Page, or YouTube 🙂 Thank you so much for all of your support! Feel free to tag me or link back here!
- For any questions, feel free to contact me via any of my social medias or the comment section down below 🙂
Enjoy!
– Bakeomaniac, Javier!


Leave A Comment