Over the years that I have been baking, I have always faced the problem of having holes in my cake mostly at the beginning but somehow, I still get them here and there still!
After being approached for help by someone who used my recipes, I have finally decided to debunk the problem once and for all through experimentation! I have created this chart for your easy convenience, with simple and straight forward explanations. Shocking reveal? They are both the same recipes! Let me help you solve the problem of having too many ugly holes in your cake!
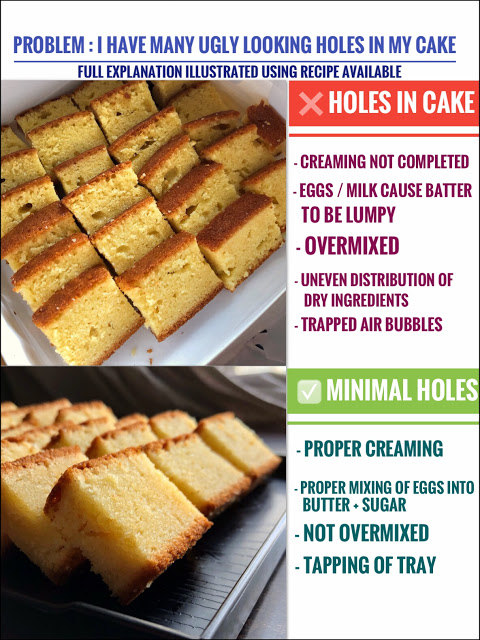
So let’s get started shall we, I am sure you can see the huge disparity between the two! Although both are edible, we would all like to strive as much as possible for one with minimal holes. Yes some holes is normal, but not too big!
Let me now make a point by point comparison between the cake with holes ( I will name it Improper Cake! ) vs the cake with minimal number of holes (Proper Cake! ), each divided into their respective headings!
Also note that the recipe used here for experimentation ( improper way and proper way ) are both from my Butter Cake. The original butter cake recipe (clickable) is modified at the end to show even clearer and more precise instructions for practice!
I know it might not be a totally fair experiment because there are too many variable factors but here are some of the things kept constant, and the only variable in my eyes!
Constant: Recipe, Ingredients, Method, Baker
Variable: Amount of Mixing ( Improper Cake will always use the mixing method that introduces air bubbles while Proper Cake will always choose the mixing method that reduces air bubbles )
1. Creaming
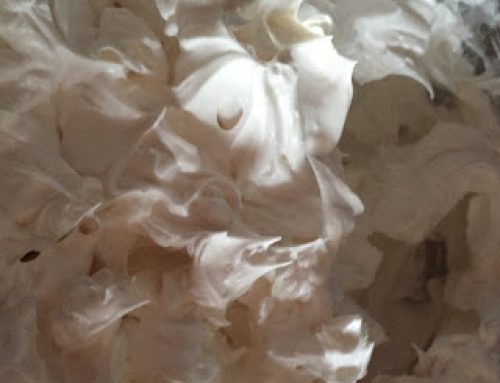
Light yellow colouration is observed, looks like yellow whipped cream!
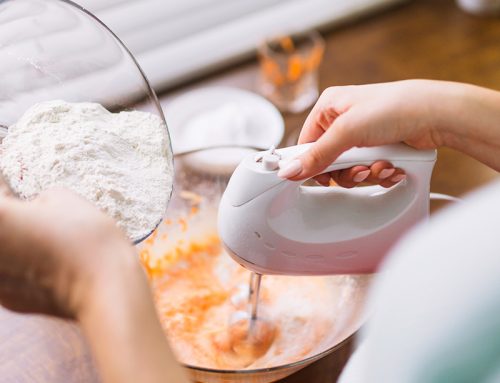
We are all aware that creaming is the mixing of butter and sugar, but how should it be done and how much?
For the improper cake: Creaming was stopped prematurely, butter and sugar not fully mixed, insufficient air is incorporated. This causes the cake to be extremely dense, trapping air ( such as carbon dioxide released from baking powder ) during baking, creating such huge pockets.
For the proper cake: Creaming was done well. You can tell when using a finger, or by sight. It will look like light yellow whipped cream, is extremely fluffy to the physical touch. It would be 1.5 times of the original size of butter and sugar before creaming!

Light yellow colouration is observed,
looks like yellow whipped cream!
2. Mixing of Eggs and Milk into Cake
We are all aware that creaming is the mixing of butter and sugar, but how should it be done and how much?
For the improper cake: Creaming was stopped prematurely, butter and sugar not fully mixed, insufficient air is incorporated. This causes the cake to be extremely dense, trapping air ( such as carbon dioxide released from baking powder ) during baking, creating such huge pockets.
For the proper cake: Creaming was done well. You can tell when using a finger, or by sight. It will look like light yellow whipped cream, is extremely fluffy to the physical touch. It would be 1.5 times of the original size of butter and sugar before creaming!

Single consistency observed,
no lumpy separation of
wet ingredients from butter.
3. Distribution of Dry Ingredients
For the dry ingredients, we are usually talking about baking powder and flour, sometimes baking soda!
For the improper cake: Sifting was done but there’s still improper distribution, causing lumps of baking powder to form, which can lead to such big air bubbles in the final product.
For the proper cake: Either sifting of ingredients were done twice, or the dry ingredients were well mixed ( I use about a minute of whisking / stirring them together ) before sifting it in. Even distribution minimizes the chances of baking powders coagulating ( or sticking ) together, minimizing chances of big pockets of air bubbles.
4. Amount of Mixing
When I talk about the amount of mixing, I am talking about how long we take to incorporate the flour and baking powder into the batter!
For the improper cake: Overmixing was done. Despite all flour and baking powder being incorporated in, more mixing was still done, causing the gluten in the flour to be activated, which traps air bubbles ( think about it like bread! ).
For the proper cake: All flour and baking powder fully incorporated usually through folding, stopped once immediately there are no longer any lumps of dry ingredients. I usually take about a minute or so maximum!
5. Tapping of Tray
The tapping of trays is a very useful tip as it allows you to even the cake batter and force out air bubbles.
For the improper cake: No or minimal tapping.
For the proper cake: Batter was tapped against the counter, with air bubbles surfacing. Cake tin containing the batter can also be dropped immediately on to the floor from a height, such as about 45cm ( partially why I try to bake in the morning too! ).

Air bubbles observed,
shows excessive air leaving the batter.
Before ending this discussion, I have included my Butter Cake recipe (click for the original) which I have used for this experiment, with the instructions being modified if you would like to practice! The ones modified / added are in bold! I hope that you will not have this problem of having too many ugly holes in your cake in the future!
Also, if you do like such articles, please do follow me on Facebook or Instagram to stay updated!
Butter Cake Recipe
by Javier Tan July-07-2018
My take on the Butter Cake! Buttery yet not greasy, moist yet soft, it leaves a pleasant and light aftertaste, perfect to go with tea!
Ingredients
- 1 Cup or 225g Unsalted Butter, softened at room temperature
- 3/4 Cup + 2 Tablespoons or 175g Granulated White Sugar
- 1 and 1/2 Cups + 1 Tablespoon or 190g All Purpose/Plain Flour, Sifted
- 3/4 Teaspoon or 3g Baking Powder, Sifted
- 1/4 Teaspoon or 1.4g Table Salt
- 1/3 Cup + 2 Teaspoons or 100ml Full Cream Milk, Room Temperature
- 3 Large Eggs, Room Temperature, 55g each
- 1 Teaspoon or 5ml Vanilla Extract or 10ml of Vanilla Essence
- Preheat your oven to 160 degrees C and line your 8 x 8 inches baking tray with parchment paper.
- Beat the unsalted butter slightly for a couple of minutes to fluff it up and loosen it.
- Add in the sugar to the butter and cream both together until light and fluffy. It would be 1.5 times bigger in size, and look like yellow whipped cream. I took 6 minutes by hand.
- Beat the eggs in a separate bowl and add in a third of the mixture at time. Keep mixing until it is of a single consistency!
- Add in the vanilla extract and salt and mix well.
- Mix in the milk and mix well. At this stage, they should also be of a single consistency!
- In a separate bowl, combine the flour and baking powder and mix well, I used a whisk and for about a minute!.
- Sift in the flour and baking powder mixture into the batter and using a spoon, fold it in. Stopped immediately once there are no longer any lumps of dry ingredients. I took less than a minute.
- Transfer the batter to your lined baking tray and hit it against the counter a few times to dislodge excessive air bubbles. I hit it against the counter and dropped from a height of about 45 cm until I no longer see any air bubbles surfacing.
- Bake the cake for about 52-55 minutes or until a toothpick inserted into the middle comes out clean. If nearing an hour and the toothpick comes out with just very fine lumps, it is considered fully baked as well.
- Cool at room temperature for an hour before serving. Cool it upside down for a denser finish. This cake tastes best after being stored overnight at room temperature.
- Prep time:
- Cook time:
- Total time:
- Yield: 1 8 x 8 Inches Cake
Notes:
- Store at room temperature for up to 6 days. If placed in the fridge, it will be hardened and can lose flavour. Can be softened again after exposure to room temperature for a couple of hours.
- Do take note that if your cake has small little holes in it, it is perfectly alright but you can minimize it by following the methods suggested on the read up!
- Feel free to ask me any questions!
- If you would like to be updated for more recipes which I strive to create to perfection for sharing, do check out my Instagram, Facebook Page, or YouTube 🙂 Thank you so much for all of your support! Feel free to tag me or link back here!
Enjoy!
– Bakeomaniac, Javier Tan


[…] Solved: Too Many Ugly Holes In Cake – Made Simple by Bakeomaniac – https://bakeomaniac.com/solved-i-have-too-many-ugly-holes-in-cake/ […]
I bake cupcakes, the first batch always comes out good but the second batch always have holes, what could be the cause.
Hey Florence, perhaps the second batch has been left too long since placing a bowl of batter out does lead to separation. I suggest giving it a gentle whisk before distributing the second batch :-)!
Hi, I would like to know why my butter cake rose and cracked on top towards the last minutes of baking. When I insert my skewer it was clean so I took the cake out. But after cool down and cut it, it looks a little bit dense and not really fluffy. And the taste is so milky.
Hey Darshini! It depends on the recipe you use.
For cake cracking, its likely due to overly high temperatures which cause the outside of the cake to be cooked faster. When the inside of the cake cooks, it can push out the outside of the cake and create cracks. You can consider lowering the oven temperatures or buying baking strips to encourage even cooking 😀
Regarding the dense / not really fluffy part, it would depends on the recipe you used and the method! Do let me know which recipe you have used if you would like to discuss this further 🙂 Hope my comments helped!
Hi,
This has got to be the BEST article I’ve ever read about such a topic as this. A million from which to pick, and gratefully, I picked this one. Finally, someone has explained for totally clueless nonbakers like me (but would like to be 😊) what is meant by “over-mixing”, etc.
And, the fact that you’ve accomplished that through writing, without me even having to *watch a video–good job. 😎
I can’t wait to retry baking my lemon loaf cake (and others), a simple one that, disappointingly, ended up tasting like rubber, as I’m guessing most holey sponges (that’s exactly what it looked like, an industrial-size sponge 😂) do.
Thanks!
J, MI
* I like videos, too, but just saying nice writing.
Aw thank you so much Joyce and I am really heartened to hear that! I am glad that the content was of help to you!
[…] you be having too many holes in your cake, or a butter cake without the egg separation method click on the links attached on this […]
[…] you be having too many holes in your cake, or a butter cake without the egg separation method click on the links attached on this […]